Hard drive is not shown in BIOS. What to do if the computer and BIOS does not see the hard drive? Failed hard drive
If the disk is not detected even by the BIOS, you will have problems loading the OS
The hard drive is the most important element in the structure of a computer, responsible for the operation of software and storage of information. Without this technical element, the computer is unlikely to give you access to all the functionality that is possible in this device, so hard drive failure becomes a serious problem. But it is quite difficult to break a hard drive unless you apply physical force to it. In most cases, the bios does not see the hard drive, and it is because of the system bios that many users cannot comfortably use the capabilities of the hard drive.
So, why doesn't the BIOS see the hard drive? System bios is a special utility that configures the motherboard. It is the bios that is responsible for such functions as recognizing equipment, the order in which the equipment starts up, and ensuring the functionality of all elements of the computer. And if the BIOS does not see the hard drive, then there may be various reasons for this: starting from the quality of the external media itself and ending with various errors that arise when the equipment fails and the user’s inattention.
Despite the fact that there are not many software elements provided in the BIOS, they often go wrong, especially when an inexperienced user decides to figure it out personally. The hard drive can also produce errors, but they can only be technical, and if you are sure that the external drive is safe and sound, then you should turn to the bios utility itself to solve the problem. Reasons for ignoring the hard drive:
- incorrect connection of elements;
- problems with jumpers;
- problems with ;
- Hard drive failure.
Incorrect connection of elements
First, to solve the bios problem, you should rule out physical problems related to the connection. It is recommended to carefully review the correct location of all wires (in this case, cables), the correctness of their connections depending on the requirements of the motherboard itself, and the integrity of the connection elements. Even small bends and grooves located in the connection sockets and on the cables themselves can cause a failure due to which the utility does not see the hard drive.
If the hard drive is connected correctly and no defects are noticed, you should pay attention to other equipment in the computer. Incorrect connection of other hardware may cause a failure in the BIOS. Be sure to check whether the cooling system (cooler) in the power supply is working: overheating of this technical element can cause a lack of energy for the equipment, which simply will not turn on.
After you check all the technical elements for connection and make sure that they are in the correct location and integrity, you should move on to the next stage of checking, due to which the bios does not see the hard drive.
Jumper problems
Jumpers are special sockets that allow you to connect equipment via special wires and cables.
The hard drive has a sufficient number of jumpers, so they must be checked.
To do this, you don’t need to be a professional: a violation of the structure of the jumper or its absence is visible to the naked eye. A broken jumper prevents the BIOS from sending a software signal to the hardware.
With a broken jumper, it is possible that the BIOS sees the hard drive. This situation indicates that the hard drive is working, but is not transmitting signals, so you should carefully examine each jumper. They are located at the base of the connection to the hard drive through special wires, as well as on the base of the motherboard, where you connect the hard drive.
If you find a distorted, scratched or missing jumper on a brand new hard drive, then you should contact the store where you purchased the equipment to replace it. If you find a defective jumper on the motherboard, you need to contact a specialized service, where they will solve this problem for you. The same option is suitable if a defective jumper has formed on your outdated hard drive.
Problems with settings in the system utility
In bios, minor failures in the structure of its software very often occur. This happens due to the fact that the BIOS often has to process a huge flow of information and endure hardware failures. Even viruses can cause glitches in bios. Therefore, to make sure the bios is working correctly, it’s worth checking the settings. This can be done using the keyboard shortcut “Alt + F...”. The second button must correspond to the command that is specified when the computer boots. It can be found on the initial download window.

After you have entered bios, you should immediately go to the Integrated Peripherals menu and check whether the functionality that allows you to see the hard drive is enabled. The functionality itself is called Advanced. In it you should go to the Onboard Devices Configuracion tab. Opposite the Onboard IDE Controller line (depending on the motherboard, the name may be different; the analogue of this line is called Marvell IDE Controller) you will see the status - Disabled (disabled) or Enabled (enabled). Accordingly, if the functionality is disabled, you need to enable it. If after the operation the bios does not see the hard drive, you can. This procedure is carried out by removing the battery from the system board. It has a round shape and silver color, it can be immediately recognized. Turn off the computer, then remove the battery, then wait 20 minutes, then put it back. The next time you start the computer, the settings will be restored to factory status. Therefore, each element of the utility will work normally. Do not be afraid that the settings will go wrong and the computer will no longer recognize the equipment. The drivers are remembered when reset, so there will be no problems.
Hard drive malfunction
If, after long checks and manipulations, the bios does not see the hard drive, you should sound the alarm: most likely, the problem is in the media itself. And the first thing you should try is to connect the hard drive to another computer. If the other device also does not see the equipment, then the media is broken. If the computer still sees the hard drive, it means you did something wrong. It’s worth trying to carry out the operation on several computers; if the bios does not see the equipment on any of them and the media itself does not show activity when connected, it’s time to contact the service.
There is also another variant of hardware recognition error, which consists of an excess of viruses on the hard drive. When, after prolonged work, you discover that the bios does not see your hard drive, you should turn it off for a while, reset the system utility settings, and the next time you start it, format it using a special disk with the necessary software (usually this can be done using a standard Windows disk).
If, after all the operations performed, the system utility does not see the hard drive, no matter how hard you try to fix it, then it is better to contact the service, where they can tell you the exact problem and think about its solution.
Hello, we came to you with a problem. We decided to upgrade the computer, but not the whole computer, but the main components: the motherboard, RAM, video card and power supply, all of which were safely installed in our old case. And now the problem is, our BIOS is not in hard drive is running and a disk drive, both IDE interface devices remained from the previous computer and we did not change them, the technician at the service center connected both drive data to our new motherboard with one IDE cable, since there is only one IDE controller connector on the motherboard. We brought the system unit home and when we turned on the computer, only a black screen, go to the BIOS, there is the inscription: Primary IDE Master No detected and Primary IDE Slave No detected. We would go back to the service center, but we don’t live in the city. What can you think of?
BIOS does not recognize the hard drive
I come across a similar situation quite often, probably before your hard drive and disk drive were connected to the old motherboard, using separate cables, to two different IDE connectors and both worked in the Main position, that is, Master. The service simply connected your two devices to one cable, but forgot about the jumpers, now both of your devices are working in Master mode, because of this there is a conflict and as a result BIOS does not recognize the hard drive and the disk drive too.
- In our article we will work with a hard drive and an IDE interface drive, if you have little experience, about how to connect and disconnect and what errors you may encounter, read in more detail. If this article does not help you, try another one, in it described .
Where they assembled your computer, we were in a bit of a hurry and now we will try to fix everything. IDE interface devices need to be configured with a jumper; this will tell your computer how to properly access the drives (and the drive). When working with IDE devices, it is very important for a computer to know who is the master device on one loop, Master, and who is the slave, Slave, this is decided by the little one. The contacts on which the jumper is mounted are located directly on the drive. Instructions for the location of the jumper are usually located on the drive body. We turn on the computer and go to, first of all you need to make sure that the IDE controller is enabled in the Integrated Peripherals tab.
Make sure the power cables are connected.

In our article, we will first set up a Seagate hard drive with jumpers, then, to gain experience, a Western Digital and Maxtor hard drive, with a Sony NEC Optiarc as the drive. Pay attention to the screenshot. I also have a similar problem, the BIOS is not in hard drive is running and disk drive, both devices are not detected Primary IDE Master No detected and Primary IDE Slave No detected.

From the very beginning, we look at how the jumper is mounted on the Sony NEC Optiarc drive. According to the instructions located on the drive body, the extreme right position is Master, which means the drive is already connected by a jumper as the main one. It is best to connect the Master device to the end of the loop.


Now let's move on to the hard drive, the Seagate hard drive is also connected as Master, two main devices on one cable is an inevitable conflict.


The result for both devices in the BIOS is No detected. Let's avoid device conflict and leave our drive as Master, and connect the Seagate hard drive as Slave. We look at the instructions and see that the Seagate hard drive operates in slave mode without a jumper at all, remove the jumper completely.


We check if everything is connected correctly and turn on the computer. The result is obvious, both devices were found and identified. Now we connect the Western Digital hard drive in the same way, everything is perfectly defined in the BIOS. Behind it is a Maxtor hard drive, everything is fine too.


Many may notice that if you connect the hard drive to the end of the cable and make it the Main-Master, and the disk drive in the middle and the slave-Slave, because the more important device is always connected to the connector at the end of the cable, you want to do it this way, after all, the work of the hard drive is a priority for us. Then the main thing is not to bend the train itself too much, don’t be too clever, it will look something like the screenshot.
The hard drive slows down no matter how you connect them. What in our case? We look in the BIOS, the speed of our DVD-rom Sony NEC Optiarc -UDMA-4, most likely the Seagate UDMA-5 hard drive will work in UDMA-4.

Why am I saying this? But why, if you have a very old disk drive, it’s better not to connect it with one cable at all, since the speed of both devices will be very low, most likely PIO, so save up for a new one in this case.
Good day everyone, dear readers! In this article I will try to explain why the BIOS does not see the hard drive - as well as ways to solve this problem, I will tell you in my article.
This problem, when the hard drive is not detected by the computer, is the most common. It occurs on both old and new computers. This also happens with new and old, external and built-in HDDs.
First, of course, you need to find out the cause of this problem. Sometimes users can solve everything on their own and get things working with Windows and the laptop’s hard drive.
Why can't my computer see my hard drive?
Let me note right away that there are several reasons why a hard drive refuses to perform its functions. These reasons include:
- For the first time, a new sata or ide drive was connected;
- There were problems with the cable or wires;
- Perhaps the BIOS is not configured correctly or is completely out of order;
- Weak power supply;
- Low cooling system;
- The hard drive itself has failed.
Yes, you need to diagnose it, and only then solve the problem. Let's say that an inexperienced user will probably have some difficulties with this. Let me help you, and together we will figure out what and how.
First connection of the hard drive
If this is your first time connecting a screw, then most likely the system simply did not see it. Yes, physically it is in working condition, but it is not displayed among local disks.
In order to fix this problem, you need to press Win and R on your keyboard, write compmgmt.msc and select “Ok”.
Find and select "Disk Management".
In the window that appears in the middle, all your connected drives will be identified, including your problematic hard drive. As a rule, it is such because the assigned letter is incorrect.
Find the required drive and right-click on it, and then select “Change drive letter or drive path...”.

A window will open in which you will have to click on the “Change” button.
Now select the desired letter and select "OK".
Wrong format
For normal functioning of the disk in Windows, the NTFS format is required.
Just as in the instructions above, go to “Disk Management”, that is, repeat the previous first two steps. After that, right-click on the disk and select “Format”.

Select the file system – NTFS, and click “OK”.
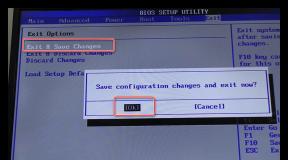
BIOS does not see the hard drive - setting
In some cases, the BIOS may set the wrong priority for boot devices. When booting the PC, press F2 (or Del). Which key needs to be pressed will be indicated when the PC starts. By pressing the desired key, you will enter the BIOS.
Please note that due to differences in BIOS versions, the names of menu items here and below may differ slightly.
Find the "Boot" tab. Use the arrows to control. In the list of boot devices, set your HDD to first place (1st Boot Priority/First Boot Device).

Press F10 to save and exit and then press Y to confirm. After this, the PC will boot from the device you set.
SATA operating mode
Often, users do not have an operating mode in their BIOS that is compatible with the IDE. To make the change, you need to go into the BIOS, select Main, Advanced or Integrated Peripherals and find the SATA Operation, Configure SATA As, or OnChip SATA Type setting.

Select IDE or Native IDE, press F10 and enter Y.
BIOS does not show hard drive
If the BIOS cannot detect your hard drive, then most likely it is due to incorrect settings or failures.
Incorrect settings appear due to user actions, and failure can occur for various reasons. So, starting from power outages and ending even with system infection. The system date may indicate this - if it is not accurate, then you have undoubtedly experienced a failure. To fix this problem, you need to reset all settings.
Find the Clear CMOS jumper on the motherboard.
Change the jumper from contacts 1-2 to 2-3, hold them for 20-30 seconds and then return them to their original position. Besides, there is another way. Find the motherboard in the system unit and remove the battery from it.

You will need to return it back in 25-30 minutes.
Conclusion
Now you know what to do if the BIOS does not see the hard drive. I hope you were able to solve your problem, thank you all for your attention, and don’t forget to ask any questions in the comments!
At the moment, this device is the most necessary and relevant for storing memory. However, many often encounter such a problem as “the laptop BIOS does not see the hard drive.” The BIOS is responsible for controlling the motherboard and the devices connected to it.
Hard drive is a system, which stores information and is responsible for the functionality of the software.
Main reasons for lack of connection

The first thing you need to do is check the connection of the ATA or SATA ports, as well as their automatic configuration.
If everything is fine with the ports and they are working properly, then you can find out why it is not displayed using the following steps:
- Check the connections of all components.
In order to determine the true cause, you need to make sure that all elements are connected correctly. You need to check the location of the cable, the motherboard, as well as their serviceability and integrity.
If everything is in order with these devices, you need to pay attention to other elements, perhaps they could cause a failure in the BIOS.
- Check the serviceability of the jumpers.
Jumpers are sockets, to which all cables and wires are connected.
If the problem is in the jumpers, then you can fix it in the following ways:
- very carefully treat the surface, removing rust;
- Clean the jumpers with sandpaper, but you must be very careful and careful.
If the steps taken do not help, then you should contact a specialist who will fix this problem.
- The next step is when you start the computer, you need to go into the BIOS system, which can be done by pressing the F 2 combination. The Integrated Peripherals menu, which opens, contains hardware parameters and data.
 Most often, in the BIOS, the external drive is displayed as Drive, or Primary Master; in order to see whether it is enabled or not, in most cases the automatic mode is set, but it is possible that the OFF parameter is assigned to it. In this case, it needs to be turned on.
If after turning it on, nothing has changed, and the BIOS still does not see the hard drive, then you need to remove the batteries from the motherboard, wait half an hour, and put everything back in place, then restart the computer.
Often this helps in solving the problem.
- No motherboard drivers. That is, when installing Windows, the drivers were damaged, or they were not there at all.
In order to install the drivers, you need to insert the drive, the second step is to turn off the computer, connect a device with a SATA interface and turn on the computer.
- The connection adapter (cable) does not work.
You need to check the motherboard connectors for cracks, fractures, and other damage. If such violations exist, the cable must be replaced.
- The drive does not spin.
To find out if it is spinning or not, you need to turn off the computer, open the system unit, turn on the computer and listen to the sound, if there is vibration, then everything is in order, if not, then the problem is in the drive.
The reasons why the drive will not spin is a lack of power or insufficient power.
- The hard drive is faulty. In this case, it is necessary, if possible, to return it or exchange it in the store.
Instructions for connecting a hard drive
1. Turn on your device, then immediately press “del”, the BIOS menu will open. Next, go to the “main” window and press “enter”. Options will open where the hard drives will be listed. You need to find the required hard drive; if it is not there, then select the “sata” connector and press auto mode.
After these steps, the hard drive will be available on the computer.
2. If the first action did not help, the sata interface controller is most likely turned off. Select the line “SATA configuration” and in the “controller” tab click “enable”.
3. After these steps, you need to restart the system and update the hardware configuration. After this, the BIOS should detect the presence of a hard drive.
By checking the connection of all elements and devices of the hard drive, motherboard and other components, you can solve the problem that has arisen such as the hard drive is not detected in bios.
However, you should take into account that it is best to choose a hard drive in a specialized store with a certain warranty period.
You should not purchase HDDs on the market or from dubious organizations. It is also necessary to take into account the characteristics, features and properties of the hard drive.
Basically, most problems can be solved using the proposed methods at home and on your own, but this does not always help to prevent complete breakdown, it's better to consult a specialist.
There are several reasons why the system does not see the hard drive:
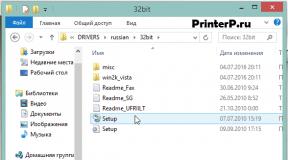
To correctly download and install drivers, perform the following manipulations:
- Load the Windows distribution into the DVD drive tray. After this, disconnect the computer from the power supply.
- Insert the SATA hard drive and connect it. Turn on your computer.
- During the installation process, you will need to press the F6 key at the appropriate moment to start the driver installation process. During the normal course of the system installation, a screen will briefly appear stating that in order to install the system normally, you need to download the missing drivers: “Press F6 if you need to install a 3rd party driver.” Try not to miss the moment, otherwise you will have to start all over again.
- After a while, an interface will appear to load drivers for the SATA controller. Press the S key to continue installation.
- To download the drivers, you will need disks with installers; this must be found and downloaded in advance on the Internet, on the website of the manufacturer of the motherboard that is installed on your computer.
Data cable fault
In my example, I will try to format an external hard drive to make it more clear.
The system will ask again whether to format correctly.
It also happens that there is no disk in the drive, but the operating system stubbornly does not see the hard drive.
In this case, try going into the BIOS parameters First Boot Device and setting it as the first
boot device is your HDD.
The computer does not see the SATA hard drive when installing Windows
If your computer does not see the hard drive when installing Windows, then there are two solutions to fix it
this problem. It should be noted that the computer does not see the SATA hard drive; such problems do not arise with IDE.
Method 3. If the two methods described above did not bring the desired result, then you will have to integrate SATA drivers into the OS distribution. The first step is to integrate individual SATA drivers or, in some cases, entire packages. You can also integrate drivers together with updates.
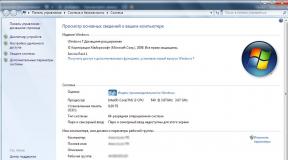
You can find out exactly what updates and drivers are required on the website of the manufacturer of your motherboard installed on your computer. To find out what kind of motherboard you have, you can right-click on the “My Computer” shortcut and through the drop-down menu go to “Properties”, where this data is indicated. You can also look at this information in the documents that were given to you when you purchased the computer.
It is worth saying that a large number of users encounter a situation where the system does not see the hard drive, especially when reinstalling Windows. If you also encounter this problem, then it is not necessary to contact a service center or specialists to solve it. You can handle it quite well on your own.
First of all, if the hard drive is not detected when reinstalling the operating system, you must resort to the methods described earlier (integrating motherboard drivers and disabling the AHCI parameter through the BIOS). If these actions did not give the desired result, then you will need to check whether the connection is made correctly on your hard drive. Figure 5 shows an example of a correct connection.
In many cases, it will be helpful for you to ask yourself this question. Yes, it can be very difficult to value in rubles something that has not been bought or sold. Perhaps, in addition to the cost of an alternative way to obtain this data, such concepts as nerves, time, memories, work done or upcoming work, and so on will be involved in the assessment. But it’s still worth trying and understanding at least the approximate cost of the data. This will help you avoid confusion and take the right steps.
2.6. Diagnostics won't hurt anyone
Even if the problem seems simple to you, and the cost of data is low and you hope to save money by solving it yourself, I strongly recommend using
in a specialized company. I think everyone will agree with me that two doctors can treat the same disease differently. And often both will achieve positive results. But no matter which method of treating a particular disease the doctor chooses, the chances of a favorable outcome will be negligible if he made a mistake in determining the disease itself. In the case where the disk is not visible, this also works. Yes, perhaps your skills, computer literacy and luck are enough to solve some simple data recovery problems. But isn’t it better to understand for sure that at least the problem is defined correctly? After all, an error in making a diagnosis is dangerous not only because recovery will not give a positive result, but also because further attempts will be complicated and the likelihood of a successful outcome will be reduced. And no matter how optimistic you are about your chances, it will be better to increase them. Moreover, you don’t have to pay for it, since there are enough companies on the market that provide diagnostics for free.
2.7. Making the right decisions
As a result of the diagnosis, you will receive answers to the following questions:
- What is the nature of the malfunction?
- Is data recovery possible?
- How much will the restoration cost?
- How soon will you receive your data?

The solution to this problem is not as difficult as it seems at first glance. In most cases, users who have installed or reinstalled the operating system encounter this problem. Don’t immediately panic and call service centers to have a specialist come to your home, first try BIOS disable option like AHCI, then try to integrate all the motherboard drivers into your computer's distribution.
If the above does not help, then try to determine how the connector is connected HDD, and how correct. This very device, thanks to which it is possible to connect a hard drive to the motherboard, has only two connectors - black and blue, which should be connected to the hard drive, since it works more stably.
The wonderful times when no hard drives simply existed have long since sunk into oblivion. The development of high technologies differs from others in that it does not obey general laws, but rushes forward like a stratospheric rocket.
Tape drive mechanisms may have failed more often than modern magnetic disks, but the reasons for their failures were much more understandable. Although... what are we saying? No, we are not asking everyone to go back to the Stone Age. God forbid! We simply present some comparisons, which, according to certain parameters, do not always turn out to be in favor of modern technology.
So, your hard drive has broken down or you suspect that the failure lies precisely in it - in the inadequate operation of this complex and obscure device. You are saved if there is another PC nearby that sees its own hard drive. Just swap these two drives and make sure that the other machine recognizes it as working.
If this is the case, then the problem lies in the incorrect settings of your system. If the second computer doesn’t see your unfortunate screw, it means it’s really faulty, and at the very least you need to take it in for repairs. As a maximum, simply throw it away and replace it with a new one if its surface did not contain some critical data.
We will assume that the screw was detected by another computer and the essence of the problem should be looked for in the settings. It happens that the BIOS (Basic Input/Output System) does not recognize this or that hardware. In this case, it is usually not recognized by Windows itself. Let's see this using the example of a hard drive.
BIOS does not see the screw

I had such a case, I changed the BIOS settings, rebooted, but the settings remained the same, that is, they did not change. The problem turned out to be a dead CMOS battery, after replacing it all my changes took effect.
Another case was even more interesting, when connecting the second hard drive to the system unit, it did not want to be seen in the BIOS and, accordingly, Windows did not see it point blank, although before that I had connected this hard drive alternately to two more system units and everything was fine there. The problem turned out to be a faulty 350W power supply; it simply did not power two hard drives at the same time. After replacing the power supply, the two hard drives worked perfectly together in this system. So keep in mind, a faulty power supply can be a problem for even a single hard drive.