Installing programs on a virtualbox virtual machine. Installing and configuring the VirtualBox virtual machine
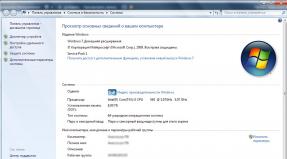
Learning to use VirtualBox is beneficial for everyone. Thanks to this service, you get virtual computers that you can run on your devices without having to buy new hardware. At its core, it is free virtualization software.
VirtualBox was created to solve many problems. Thanks to this functionality, you get the opportunity to create virtual computers out of thin air. They don't take up any space on your desk, but they work just like a real PC. They can be created and deleted with a few clicks.
What is VirtualBox? It is a free, open source, cross-platform application for creating, managing and running virtual machines (VMs) - computers whose hardware components are emulated by the host computer, or device, on which the program is running. VirtualBox can run on Windows, Mac OS X, Linux and Solaris.
Why is this necessary?
Using virtual machines can be extremely useful for a number of reasons. For example, you can run it to try software that you think might be dangerous, or you can try a different operating system without changing the way your computer is configured.
You can also use it for security purposes. For example, you can create a virtual machine just for online banking to make sure you don't fall victim to spyware or Trojans getting your data.
How to install VirtualBox?
The easiest way to get the latest version of VirtualBox is to download it from the download page of the official website. There you can find the appropriate version for your platform or? If you use Linux, you can study the list of instructions for the various distributions of this OS.
For each version of Linux, you are given the option to download the "i386" or "amd64" option, 32-bit and 64-bit versions, respectively.
How to install VirtualBox? The process is similar to installing any other program on your platform, so you shouldn't have any problems. If you have any difficulties, you can always read the installation guide on the service's website.

Using VirtualBox
How to use VirtualBox? When you launch the application for the first time, you will be greeted by the VirtualBox Manager. Here you can create virtual machines, enable or disable them and configure access to the virtual hardware available to them, as well as make network settings.
Creating a virtual machine
In order to configure the network in VirtualBox and get started, you will need to create a virtual machine. This is done as follows.
The first step to creating any virtual machine is to click the Create button in the top left corner of the VirtualBox Manager window - that's the big blue star that's very hard to miss.
This will launch the New Virtual Machine Wizard, which will walk us through the steps required to get it up and running.
Enter the name of the virtual computer. This name is completely up to you, but there are some nuances.
VirtualBox will try to figure out what OS you plan to run in the virtual machine based on what name you enter. If the name mentions "XP", it is assumed that you will be installing Windows XP and configuring it accordingly. However, you can come up with a random name. You will then have the option to manually select your OS type from the drop-down lists below. When you do this, click Continue to move on to the next step. This example looks at Windows for VirtualBox. Below are instructions for installing this OS as a guest OS and then setting up a network connection.

Selecting RAM
To install the guest OS after running VirtualBox, you will be asked to select the amount of RAM you want to place in the virtual machine. The more space you give it, the better the application will perform, but keep in mind that the memory allocated to the virtual computer cannot be used by the host OS (that is, the computer on which VirtualBox is installed).
So how much RAM should you allocate to a VM? This depends on a number of factors. If you plan to only use the virtual machine while it's running, you can afford to give it more RAM because you won't be asking the host system to multitask. If, on the other hand, you will be using it while running many other functions on the host OS, you should better calculate this value. A good general rule is to allocate half of your computer's RAM. So, if your PC has 4GB RAM, give 2GB to the VM, leaving the host with the rest. If you select this value with a blunder, you will encounter the fact that VirtualBox does not start.
Storage space
The next step is to create a “virtual hard disk” (VHD). This creates a file on your HDD that can be used by VirtualBox to act as a separate hard drive. This allows you to install the operating system without worrying about your existing data being affected.
Make sure Boot Hard Disk and Create a new hard drive are selected, then click Continue. This will launch "Create a new virtual disk master". Click Continue again to complete the action.

You'll then be asked whether you want to create a "dynamically expanding" or fixed-size disk. Each has its own advantages. The great thing about a dynamic disk is that it only takes up as much space as the data it contains. It is also much faster to create than a fixed one of any significant size.
However, you need to keep an eye on this because his flexibility can also be his negative trait. So you create a dynamic disk and assign 50 GB to it and then put about 20 GB of data on it. Its file will appear as holding only 20 GB of hard drive space, according to your host OS. Therefore, you can take this place with other data and not notice it.
The point is that if you start a virtual machine and try to add more data to the dynamic disk, you will have problems - the virtual disk says it still has 30 GB, but in fact it may no longer have it.
This is also the advantage of a fixed-size disk. Sure, it's inconvenient when you're trying to figure out how much space you'll need, but then you won't have to worry about it anymore.
This example shows dynamic disks, but fixed ones will work just as well. Make sure Dynamically Expanding Storage is selected, then click Continue again. Next, you will be asked to select a name, location, and size for the new VHD. For most uses, you won't need to change the name or location, but you can do so by clicking on the folder icon next to the text field.

The size you should specify depends on how much material you plan to use. If you just want to use it to run a few programs, the suggested size of 10 GB should be sufficient. Make sure the settings are correct, then click Continue and Finish.
At this point, you just need to check everything and make sure that all the settings are set as you expect. Then you just need to click "Finish" and the virtual machine will be created so you can install Windows.
Booting a Guest OS in VirtualBox
How to continue using the service? Now it's time to run the virtual machine for the first time. Make sure the new virtual PC you just created is selected in the VirtualBox Manager window, then click the Start button at the top of the window. When the service starts, you will be greeted with a First Run Wizard window that will help you prepare to install Windows XP. Click Continue. It will then ask you whether you want to use a CD or an image on your hard drive (usually an .iso file) as your installation media. Once you've selected your option, click Continue, then Finish.
If you were unable to open the VirtualBox virtual machine after the above settings, you probably did not allocate space for RAM or HDD correctly. If rebooting does not solve the problem, repeat the previous steps again.
Since there is nothing installed on the virtual hard disk, Windows Setup will automatically load. It will take some time to download all the necessary OS files, but eventually you will see a screen that displays a list of existing partitions and unallocated space on the computer.
After this you should configure XP, so press Enter. You will be asked how you want to format the drive. You need to select the “Format partition using NTFS (Quick)” option. Make sure you select the "Fast" option or you will be waiting for a very long time!
Windows Setup will then format the VHD and then begin copying the files to the drive. Your participation in this process is not required. Once the files are copied, Windows Setup will automatically restart your computer to move on to the next step.
When the PC reboots, it will try to boot from the CD using the "Press any key to boot from CD..." window. Ignore it! If you do this, you will repeat the previous step again for no reason.
You can prevent this system issue by right-clicking the CD icon at the bottom of the virtual machine window and clicking "Remove disk from virtual disk." Once this window closes, you'll see the familiar Windows XP boot screen before it switches to the second installation step.
Once the “Windows XP Installation Wizard” is displayed, click “Next” to begin it. You'll first be asked to set your regional and language settings, which basically involve clicking "Customize..." (to select your country) and then "Details" if you need to change your keyboard layout.
Once everything is selected, click Next again. After this, you will need to enter your computer name and administrator password. It's better to choose a name that has some meaning instead of a random string of automatically generated characters. How complex you want to make the administrator password depends on how important the security of the virtual machine is.
After clicking Next, you will see the date and time settings, which you do not need to change. When you click this button again, the window will disappear for a while, Windows will apply all the settings and continue with the installation. You can now use Guest Additions in VirtualBox.
After a minute or two, another window will appear, this time for network settings. It is more convenient to choose the first option (a network that does not have a domain). This requires entering the workgroup name - Rward by default, and all default values. However, you may need to select "Direct3D Support" when asked to identify components.
How to work with the network?
Networking in VirtualBox is extremely powerful, but setting it up can be a little tricky. To figure this out, we need to look at the different ways to configure VirtualBox networking, with a few pointers to what configurations to use and when.
Oracle VM VirtualBox 5.1 allows you to configure up to 8 virtual network adapters (network interface controllers) for each guest virtual device (although there are only 4 in the GUI).

Main modes:
- Network Address Translation (NAT).
- Bridge networks.
- Internal network.
- The network is for hosting only.
- NAT with port forwarding.
Oracle VirtualBox offers them as based on the guest OS type you specify when you create the virtual machine, and you rarely need to modify them. But choosing a network mode depends on how you want to use the device (client or server) and whether you want other computers on your network to see it. So, you should look at each VirtualBox network configuration mode in a little more detail.
Network Address Translation (NAT)
This is the default mode for new virtual machines and works fine in most situations where the guest OS is a "client" type (i.e. most network connections are outgoing). Here's how it works.
When the guest OS boots, it typically uses DHCP to obtain an IP address. Oracle VirtualBox will send this DHCP request and inform the operating system of the assigned IP address and gateway address for routing outgoing connections. In this mode, each virtual machine is assigned the same IP address (10.0.2.15) because each one considers itself to be on its own isolated network. And when they send their traffic through the gateway (10.0.2.2), VirtualBox rewrites the packets so that they appear as if they came from the host, and not from the "guest" (running inside the host).
This means that the guest OS will work even if the host moves from network to network (such as a laptop moving between locations), from wireless to wired connections.
However, how does another computer initiate a connection with it? For example, you need to connect to a web server running on a guest computer. This is not possible (usually) using NAT mode because there is no route to the guest OS. So for running virtual machine servers you need a different network mode and a different VirtualBox network setup.
NAT connection (network characteristics):
- Guest OSs are on their own private network.
- VirtualBox acts as a DHCP server.
- VirtualBox's NAT mechanism translates addresses.
- Destination servers display traffic originating from the VirtualBox host.
- No configuration is required for the host or guest OS.
- Works great when the "guests" are clients but not servers.
Bridged networks
Bridged Networking is used in cases where you want your virtual machine to be a full member of the network, that is, equal to your host device. In this mode, the virtual network adapter is "connected" to the physical one on your host.
This is because each virtual machine has access to the physical network just like your host. It can access any service on the network - external DHCP services, name lookup services and routing data, and so on.
The downside to this mode is that if you run a lot of virtual machines, you may quickly run out of IP addresses or your network administrator will be overwhelmed with requests for them. Second, if your host has multiple physical network adapters (such as wireless and wired), you must reconfigure the bridge if it reconnects on the network.
What if you want to run servers in a virtual machine, but don't want to involve a network administrator? Perhaps one of the following two modes will work for you, or you may need a combination of additional options, such as NAT vNIC + 1 Host-only vNIC.

Bridged network characteristics:
- VirtualBox bridges are for the host network;
- good for any guest OS (both client and server);
- use IP addresses;
- may include guest configuration;
- Best suited for production environments.
Internal network
When you configure one or more virtual machines to run on an internal network, VirtualBox ensures that all traffic on that network remains within the host and is only accessible to the device on that virtual network.
The internal network is a completely isolated system. It is good for testing. In it, using a virtual machine, you can create complex internal networks that provide their own services (for example, Active Directory, DHCP, etc.). Note that even the host is not an element.
This mode allows the virtual machine to run even if the host is not connected to the network (for example, on a plane). However, with this type of connection and network setup, VirtualBox does not provide such “convenient” services as DHCP, so your device must be statically configured or provide the DHCP/Name service.
Installation of several internal networks is allowed. You can configure virtual machines to allow multiple network adapters to be in internal and other network modes, thereby providing routes if needed. But all this looks complicated and inaccessible to a non-specialist.
What if you want the internal network to accept the VirtualBox host while providing IP addresses to the guest OS? To do this, you may need to configure a host-only network.
Internal network characteristics:
- guest operating systems can see other “guests” on the same internal network;
- the host cannot see the internal configuration;
- network configuration required;
- even if the host is not a party to the connection, the internal network can be used in conjunction with a bridged connection;
- well suited for multi-user networks.
Hosting only network
Works almost the same as an Internal Networking connection, where you specify which network the guest server is on. All virtual machines located on this network will see each other and the host. However, other external devices cannot see "guests" on this network, hence the name "host only".
It is very similar to an internal network, but the host can now provide DHCP services. To set up such a connection, go to VirtualBox Manager and select the default settings.
Network characteristics:
- VirtualBox creates a private internal network for the guest OS, and the host sees the new NIC software.
- VirtualBox provides a DHCP server.
- Guest operating systems cannot access the external network.
NAT with port forwarding
Now you can imagine that you have learned enough modes to handle every case, but there are exceptions. What if your development environment is on a laptop, for example, and you have one or more virtual machines that need other computers to connect to? And you are constantly forced to use different client networks.
In this scenario, NAT will not work because the external machines must be bridged. This may be a good option, but you may need IP addresses. Additionally, software may not always be able to cope with changing networks.
If you use an internal network, you may find that your virtual machines need to be visible on the network. What to do in such cases?
Configure the virtual machine to use a NAT network, add port forwarding rules, and connect external computers to the “host”. The port number and connection will be forwarded by VirtualBox to the guest OS number.
For example, if your virtual machine runs a web server on port 80, you can configure the above rules. This provides a mobile demo system that does not need to be re-configured every time you connect your laptop to a different LAN/Network.
Ultimately, VirtualBox has a very powerful set of options, allowing you to customize almost any configuration you might need. To choose the option you need, read the VirtualBox instructions on the official website.
A virtual machine is used to simulate the operation of an operating system (Windows, Linux or Mac) on a single physical machine. In other words, you can deploy several virtual machines on your computer that will work as full-fledged operating systems, while being located on your computer/laptop and using the resources (processor, RAM, hard drive) of your computer/laptop. At home, virtual machines are very convenient for various tests and building a small network. In organizations, virtual machines are used to share server resources and install multiple operating systems (depending on the server configuration and the requirements for the virtual machines). In this article I will describe working with the most popular program for deploying virtual machines for home use.
VirtualBox is a very good virtualization product for enterprise and home use. Not only is VirtualBox extremely feature rich, it is also the only professional solution that is freely available and open source under the terms of the GNU General Public License (GPL) version 2 and plus everything is entirely in Russian.
First of all, you need to download the latest version of the distribution VirtualBox
.
After that, run the installer file. In the welcome window, click "Next"
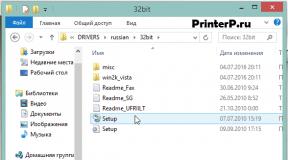
After this, you will be prompted to select installation components and the path, I recommend leaving everything as is and clicking "Next"
The next window will ask you to install VirualBox shortcuts, you can leave everything as is and click "Next".
The next window warns that the network may turn off during installation; if you do not download anything during installation, you can click "Next", otherwise finish the download and then continue installing VirualBox. 
In the next window click "Install"
During installation, windows will appear about the installation of the USB controller, network services and network adapters, click "Install".
After installation is complete, click "Finish"
After installing VirtualBox, we will begin creating a virtual machine, but first we will change the interface language, unless of course it suits you. To do this, in the VirtualBox panel, click “File-Preferences...”
In the Settings window select "Language" and in the right column select the necessary panel language settings, in this case Russian, press "OK".
Now let's start installing the virtual machine. Click on the top of the panel "Create"
In the window Create a virtual machine enter the name that will be displayed in VirtualBox, select the type and version of the operating system to be installed. 
Then we indicate the amount of allocated RAM for this virtual machine; in the future, this value can be easily changed. 
Since we are creating a new virtual machine, in the next window we select “Create a new virtual hard disk”.
Then we indicate the type of file that will serve as the hard drive for the new virtual machine, I recommend leaving VDI.
After that, choose a storage format, I recommend leaving Dynamic virtual hard disk.
Specify the size of the hard drive, the smallest size is indicated by default, if this is not enough for you, use the slider to determine how much space is needed. 
We launch the created machine, to do this, select it and click on the top of the VirtualBox panel “Run”.

When you start, a window will appear in which you need to select the drive of your drive in which the installation disk is installed, or specify the ISO image of the operating system and click "Continue" after which the familiar installation of the operating system on the virtual machine will begin.

If after installing the operating system you need to change the parameters of the virtual machine, you must select it in the VirtualBox console and click "Settings".

On the menu System you can change the amount of RAM allocated to the virtual machine and determine the boot order when turned on.

In masonry CPU specify the number of processors allocated to the virtual machine, as well as the processor load limit. 
In the network menu you can define the number of network adapters and the connection type.
In mode "NAT", the guest network interface is assigned by default an IPv4 address from the range 10.0.x.0/24, where x denotes a specific NAT interface address, determined by the formula +2. Thus, x will be equal to 2 if there is only one active NAT interface. In this case, the guest operating system receives an IP address of 10.0.2.15, the network gateway is assigned an address of 10.0.2.2, and the name server (DNS) is assigned an address of 10.0.2.3.
In connection type "Network Bridge" the virtual machine works the same as all other computers on the network. In this case, the adapter acts as a bridge between the virtual and physical networks. On the external network side, it is possible to directly connect to the guest operating system.
When connecting type "Virtual Host Adapter" guest operating systems can interact with each other, as well as with the computer on which the virtual machine is installed. In this mode, the host adapter uses its own dedicated device called vboxnet0. It also creates a subnet and assigns IP addresses to the network cards of guest operating systems. Guest operating systems cannot interact with devices located on the external network, since they are not connected to it through a physical interface. The Virtual Host Adapter mode provides a limited set of services useful for creating private networks under VirtualBox for its guest operating systems. 
On the menu Shared folders you can mount a folder for easier file sharing with virtual machines. To do this, click on the button Add a shared folder(on the right is a folder with a plus sign) and specify the path and name of the shared folder. 
I hope this article helped you in installing and configuring VirtualBox.
Installing software on a computer, especially little-known software, is always associated with a certain risk. The program may contain errors that affect the stability of the system, built-in advertising or tracking modules, and other unwanted elements. In addition, any software leaves traces on the system that may not have the best effect on its operation. As for experiments with Windows, everything is even more risky here, because sometimes even a seemingly insignificant change in registry data or modification of system files can lead to the most unpleasant consequences.
Ask how to avoid them? It’s very simple, use virtualization systems, for example, the VirtualBox virtual machine - a special program that allows you to install, run and test different operating systems in an isolated environment. You can do anything with such virtual computers - install programs on them, configure them, modify system files, work with disks and partitions, in a word, perform any experiments. If the virtual OS is damaged, you can restore it from a snapshot or delete it altogether - this will not have any effect on the host system, that is, the main working system.
Installing VirtualBox for Windows
Perhaps all this may seem complicated to some, but in fact there is nothing in working with Virtualbox that a novice user cannot handle. So how to use VirtualBox? As usual, it all starts with installation. We go to the developer’s website www.oracle.com/virtualization/virtualbox/index.html and download the latest version of the program.
Installing VirtualBox on Windows 7/10 is almost no different from installing most other programs; you just need to follow the instructions of the wizard and do not change anything in its parameters. Upon completion of the procedure, you will receive a ready-made virtualization platform.


Creating and basic configuration of a virtual machine
Like installing VirtualBox, creating and configuring a virtual computer is not particularly difficult; the program automatically selects the best configuration depending on the operating system being installed. User control, however, will not hurt.
Let's create a virtual machine for Windows 10 32-bit as an example. Launch VirtualBox and click the “Create” button on the toolbar. In the window that opens, give the machine a name (can be arbitrary); in the drop-down lists, select the operating system and its version.

At the next stage, you will be asked to specify the amount of RAM allocated to the virtual machine. There are no strict rules regarding the allocated RAM; for 32-bit Windows it is advisable to reserve at least 1 GB of memory, for 64-bit Windows - at least 1.8-2 GB.

At the third stage, a virtual hard disk is created, here we leave everything by default. Click “Create”, select the disk type VDI or VHD.


As for the storage format, it is better to select “Dynamic”, this way you will save time and space on the physical disk, although losing a little in performance.

We set the size of the virtual disk as desired, but not less than specified in the operating system requirements. Click “Create”.

The virtual machine has been created and now you can quickly go through its settings. First of all, however, go to the settings of the VirtualBox program itself and on the “General” tab change the path to the virtual machine storage directory. It is best to allocate a folder for them on drive D, where there is the most space.

Now go to the settings of the created VM and check the following parameters:
- In the “General” section on the “Advanced” tab, change the path to the VM snapshot files if necessary (it is advisable to place them in the folder with the main VM container file). Here you can enable a shared clipboard for the host and virtual machines.
- If you want to install the system in EFI/GPT mode, in the “System” section, be sure to check the “Enable EFI (special OS only)” checkbox.
- To be able to run 3D applications on a virtual machine, in the “Display” section, check the “Enable 3D acceleration” checkbox.


Setting up the Internet and shared folders

If you plan to provide access to the VM to other users of the local physical network, you should select the “Network Bridge” connection type in the VirtualBox network settings. To ensure interaction between different virtual machines, the “Virtual Host Adapter” mode is used; to connect guest operating systems to a single internal network, the “Internal Network” mode is used. There is also a “Universal Driver” connection type, but it is used much less frequently.
Of particular interest are shared folders in VirtualBox, thanks to which the user can exchange any files between the host and virtual machines. You can connect such a directory in the “Shared Folders” section. To do this, click on the plus sign opposite the “Machine Folders” item, select a folder on your hard drive through the overview and connect it, not forgetting to check the “Auto-connect” checkbox.

Starting a VM and installing the operating system
Now you know how to configure VirtualBox and the created VM. Next, let's see how to install the operating system on it. The procedure for installing an OS on Virtualbox is practically no different from installing it on a physical computer, except that instead of a bootable flash drive or DVD, an ISO installation image is used here. Launch the created virtual machine and specify the path to the bootable ISO image with the system in the window that opens.

The standard installation procedure will begin, during which you will be asked to accept the license agreement, partition the disk, and after copying the system files, create a user account.


The guest operating system is installed, but some functions, in particular, shared folders and the clipboard, will not work until you install a special plugin - guest OS additions. In addition, without these add-ons you will not be able to adjust the screen resolution, connect flash drives to the virtual machine, etc. Fortunately, you don’t need to download anything; guest OS add-ons are included with VirtualBox. All you need to do is select the option in the virtual operating system menu Devices – Mount the Guest Additions disk image.

Go to the “This PC” section in the virtual OS, open the disk drive VirtualBox Guest Additions and, if the system does not offer to do this itself, run the executable file VBoxWindowsAdditions.exe.


Install the add-ons as a regular program, accepting the security agreement, and restart the virtual computer.


The guest system is ready for use, all that remains is to check the network operation. We will not dwell in detail on how to set up the Internet in VirtualBox. If you selected NAT, the VM will connect to the Internet automatically. With other types of connections, you will most likely have to tinker a little. Remember the main thing: if the IP address for your main computer is issued automatically by the router, the same settings must be set in the parameters of the virtual system network adapter. If settings are assigned manually, then they must also be assigned manually in the guest system network adapter settings.

Main problems when working with VirtualBox
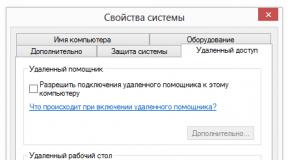
VirtualBox is a stable and high-quality software product, and if users have to encounter problems during its operation, the causes of the latter are most often the errors of the users themselves. Thus, those who try to launch virtual machines on VirtualBox with Hyper-V active will encounter the error “Failed to open a session for the virtual machine” (code E_FAIL 0x80004005). The reason is the incompatibility of these virtualization platforms. If you are planning to use VirtualBox, please disable Hyper-V and vice versa.


However, the disabled virtualization function in the BIOS can lead to the same error. This will be indicated by the unavailability of hardware virtualization options in the virtual machine settings (VT-x/AMD-V and Nested Paging in the section System - Acceleration). By the way, these options must be enabled even with active virtualization in the BIOS, otherwise the VM will also not start.

A VM crashing into BSOD upon startup is a common problem caused by a lack of physical computer resources allocated to the guest operating system. When creating a virtual machine in VirtualBox, you need to ensure that the allocated resources meet the requirements of the operating system.

The Blue Screen of Death can also be caused by Hyper-V being enabled on the host system and a controller type mismatch. If the virtual disk was previously connected to SATA, and then you connected it to IDE, the guest OS will fail with a critical error and crash into BSOD. The issue is resolved by creating a new compatible controller and connecting a container file with the guest system to it.
Accidental deletion of snapshot files by the user can result in the inability to start the VM. You need to delete snapshots correctly - through the “Snapshots” section, otherwise you will have to completely reinstall the guest system. If VirtualBox itself does not start or when you start it you get the error “Cannot access the kernel driver!”, most likely you will have to uninstall the program and then reinstall it.
If you want to install one or more operating systems on your computer, completely different ones, it would be a very mistaken attempt to install these operating systems on hard drive partitions. We encounter this error quite often. This approach promises nothing but loading problems and wasting hard disk space. How to get out of the situation? There is a great solution - a virtual machine! How to install and configure a virtual machine using Oracle VM VirtualBox as an example? Read in this article...
One of the reasons why we need this was named and it sounded like the need to get anonymous access to the Internet. What else might motivate you to create a VirlualBox virtual machine? For example, you have never seen the Linux operating system in use, but you want to try it, but you don’t want to “destroy” a working Windows system. Or you need to try a new software package, the stable operation of which you are not sure of or you doubt that you even need it. All this can be done without harm to the main operating system using a virtual machine.
A few terms for a proper understanding of the topic. The operating system (OS) on which the virtual machine (VM) runs is called the host operating system or simply the Host. The operating system we run is called a guest operating system. The Guest OS can be the same type as the Host. For example, we can run Windows 7 on top of Windows 7, this is the simplest option for virtualization systems. It is much more interesting to experiment with different types of OS, for example, running Linux on top of Windows, which is what we will do today as an example.
First, we need a VM distribution kit, or in common parlance, an installation file. Finding it couldn't be easier, but so as not to bog you down with unnecessary training, I'll just provide a link to the download page:
All you have to do is select the link that corresponds to your OS, for the case of Windows; at the time of writing, it looks like this: VirtualBox 4.1.18 for Windows hosts x86/amd64. This means that the same distribution will be used for both 64-bit and 32-bit OS. Download the file from the link corresponding to your OS and start the installation. In the case of Windows 7, you will be asked to confirm the launch and allow changes to be made.

After the installation begins, click Next, which means “next” in Russian, without changing the set of components offered by the installer.

For successful installation we will need approximately 140 MB of free space on the system disk. Yes, and to install the Guest OS, we will also need from 5 to 25 GB of free space on any partition of the hard drive to accommodate the Guest OS virtual disk.
We receive a warning about a possible short-term loss of network connection. This occurs due to the installation of additional VM network drivers.

Click Yes and wait a few minutes for the installation to complete.


Hooray! The first stage is almost finished. All that remains is to click Finish, leave the launch mark after installation selected, which after installation is complete should lead to the launch of the VirtualBox VM.
If no failures occurred during the installation phase, the following window will open as a result. There will be only one active button in it in the form of a blue sun with the caption – Create. To create a VM and further install the guest OS, we need it.

Now let's move on to creating a VM. Click Create, enter the name of our future system (it can, in principle, be arbitrary), select Linux as the OS type, and leave Ubuntu as the version.

After clicking Next, you will be prompted to install the required amount of memory available to the Guest OS. Make sure that the slider does not go beyond the green zone, but is sufficient. If your computer has 1GB of RAM installed, no more than 512MB will be available for the Guest OS. In general, you can allocate no more than half the amount of memory installed in your computer for the Guest OS.

Now it's time to allocate space for the Guest OS virtual disk. The proposed 8GB of space should be enough to install the system unless you plan to save all your data on the VM disk in the future.

We leave the disk type as VDI - this is the native format for VirtualBox. Next again, now we see the choice between dynamic and fixed disk type. Each type has its own advantages; dynamic will take up less space and grow as it fills, while fixed will immediately take up the full amount allocated to it, but will work faster. Personally, I prefer dynamic.

By default, the VM disk will be located in the c:\Users\Username\VirtualBox VM\ folder, where “Username” is the name of your account in Windows 7. In other OSes, everything will be a little different. We leave the proposed VM disk size unchanged or change it if it is necessary to shrink it or allocate additional space. Click Next again.

We read what we got in the end, if everything is as you planned, we confirm by clicking the Create button.
The machine is already ready; to start the VM, all that remains is to connect the boot disk image to the VM drive or specify that we will use a physical optical drive if you already have the installation disk on a separate optical media. To do this, click the Properties button that has become available and select the Media section on the left. In the Storage media form there is an IDE controller to which the virtual drive is attached, but now it is empty. On the right, under Attributes, you must either check the Live CD/DVD option if an optical disc is inserted into your CD/DVD drive, or by clicking the disk icon on the right, select the location of the Guest OS installation image.

Once selected, everything should look like this:

Now about where to get the image. It is available via the link from this page: http://xubuntu.org/getxubuntu/.
To download the image, we need a program that can download torrent links. This could be the Opera browser, which can do this, or, for example, utorrent for Windows. You can download it from here: http://www.utorrent.com/intl/ru/downloads/complete?os=win. One can argue for a long time about the dangers and benefits of downloading through torrent links, but in this case it is the simplest, most reliable and fastest way to get the necessary disk image.
Now you can start launching the created VM, and at the same time see what one of the varieties of Linux OS looks like. In the future, it will be possible to delve into the properties of the VM, change various parameters and see how this affects the operation of the VM, but we will leave all this for the curious to work on independently.
After starting the VM, you need to wait for the graphic screen to appear with the choice of installation language, select Russian and click the “Install Xubuntu” button. The system will check the parameters of your VM, and if everything is in order, it will allow the installation to continue. You can also select the Install updates and Install third-party software items, this will eliminate the need to manually configure Flash and codecs for listening to MP3. Next, the installer will offer to erase the disk and install Xubuntu. We boldly agree, because... nothing other than the virtual partition is available in the Guest OS, and nothing will be lost or erased on the real OS. The installer will plan and format the disk independently, so choose to continue. All that remains is to choose a time zone, it is different for everyone, and I can’t even guess where you are reading this article. We select our location on the map with the mouse, and the system itself knows what zone it is. For my computer, the system returned the location of Zaporozhje. Next, select the keyboard layout, most likely it will be Russian, unless you prefer something else. All you have to do is enter your name and come up with a password; the system will check if the password matches the two input fields and evaluate its complexity. Choose a password that you can remember, but do not enter something like: 123, qwerty, password, test, user, god, etc. - such passwords can be calculated in a couple of minutes by a hardworking “breaker”. You shouldn’t be too clever; a password like G%4v$$q12&hB will be considered reliable, but it will probably get lost both in your head and on paper.
Now the system will install the necessary packages and upon completion will ask you to reboot the VM. During installation, it is advisable that the computer be connected to the Internet, this will allow you to immediately install some system updates. During the installation process, a slide show introduces the user to the main applications and interface features, so don’t be lazy, look and read everything on the slides. In the future, this will save time and effort for performing practical tasks in the system. After the reboot, the final step was to install guest OS additions. To do this, from the VM menu, select the Devices section and in it the item Install guest OS additions. A disk with additional drivers for the guest OS will be mounted in the virtual drive of the guest OS. In our case, we will need to run an application named VBoxLinuxAdditions.run, moreover, this must be done with administrator rights. Right-click on an empty space in the window with the contents of the virtual drive. Select the context menu item Open terminal. In the window that opens, type the command:
sudo ./VBoxLinuxAdditions.run
Press Enter, then you will need to enter the password, the one we entered at the beginning of the installation, I hope you have not forgotten it yet, press Enter again and wait for the installation to complete. Upon completion, reboot the guest OS system. In the upper right corner of the screen there is an inscription with the user name, left-click on it and select Restart.
This is the result that should await us in the finale, if everything went without errors. If something goes wrong, write to us and we’ll try to figure it out.

Once you've installed a virtual machine and realized how easy it is, you'll probably want to try installing something yourself. All you need is an ISO image of the installation disk and select the correct OS type. Explore first those systems that are in the list of VirtualBox, do not immediately jump to setting up Mac OS X 10.8 Lion. Over time, you will learn to do this, but only when you understand in detail all the intricacies of the VM’s operation. In the meantime, you can experiment with the installed Xubuntu system, as it seems to me, it deserves your attention.
We have successfully taken one of the steps that brings us closer to anonymity on the Internet. To complete the journey, we still have to install a package that allows us to hide the real IP address of our computer - Tor Project, but more on that next time. Good luck and thanks for reading our blog!
GD Star Rating
a WordPress rating system
I started talking about what a virtual machine is and what it is needed for.
And now I will tell you about the program for working with virtual machines, how to install and configure it.
There are many different programs for working with virtual machines, the most common are: Oracle VirtualBox, VMWare Player, VirtualPC.
Each option has features, advantages and disadvantages, but VirtualBox absorbs all the advantages of other options, is free and has very flexible configuration and support for many operating systems for virtualization. Of course, there are also disadvantages, but they will be noticed only by professionals who do this and use virtual machines for special needs, using different technologies.
And so in this article I decided to show how to work specifically with VirtualBox, and if someone is interested, you can figure out other options without any problems.
So let's begin...
First of all, download the program Oracle VirtualBox. Go to the website: virtualbox
If you are using a Windows operating system, click on the “x86/amd64” link next to the “VirtualBox 4.3.12 for Windows hosts” line.
If your browser is configured to always prompt you before saving a file, you will receive a window where you need to specify the location where the file will be downloaded. Select a convenient folder for downloading on your computer and click “Save”:
If the browser has a setting that files will be downloaded without a request to the specified folder, then such a window as above will not appear and the file will be downloaded to the folder specified in the settings itself.
The file size is about 100 Megabytes.
Run the downloaded file and the installation of the program will begin. In the first window, click “Next”:
In the next window, you can disable some options and functions that you think will not be used in the program and this will reduce the size of the installed program. For all beginners and those who are not particularly computer savvy, I recommend leaving all options enabled and simply clicking “Next”:
Upon completion of the installation, they offer 3 options: place the icon for launching the program on the desktop; place the icon in the quick launch panel (for operating systems Windows Vista, 7, 8), associate virtual machine files with the VirtualBox program. Enable or disable the first 2 options at your discretion, and I highly recommend enabling the last “Register file association”:
Click “Yes” in the next window. Here we are warned that additional network connections will be established for the virtual machine and the real connection may be interrupted. Nothing bad will happen and you most likely won’t even notice anything:
In the last window before installation, click the “Install” button:
The installation process will begin and approximately towards the end a window will appear where you need to confirm the installation of software for USB (so that real USBs work in the Virtual Machine):
You just need to check the box “Always trust Oracle Corporation software” and click the “Install” button.
After installing the program, there will be a checkmark in the window, which means that the program will launch itself after clicking the “Finish” button. We recommend leaving this checkbox and clicking “Finish”:
In any case, you can launch the program from the desktop icon or from the Start menu > All Programs.
After installing and launching the program, it will look like the image below:
Let's immediately make some program settings. To do this, go to the menu “File” > “Settings”:
The first thing we will do is set a folder for storing virtual machine files. These will be full-fledged systems and will take up enough space. For example, I use a virtual machine with Windows XP for my purposes; it is the fastest of the entire Windows line. So, in this virtual machine I have all the updates installed, Microsoft Office 2010, SafeSerf autosurfing programs and 2 browsers (Mozilla FireFox and Google Chrome) and the folder with the virtual machine already has a size of 8.74 GB. So when choosing a folder to store virtual machines, keep this in mind.
You can set the folder for storing virtual machines on the first “General” tab. There you need to open the list next to the words “Folder for cars” and select “Other”. Next, specify a convenient folder for storing virtual machines. You can, of course, leave the one that is set by default, but it is best to store virtual machines on a disk that is not a system one (the one on which Windows is installed) and on which there is a lot of free space, because the size of virtual machines can be 15 GB or more :
In the settings on the “Updates” tab, make sure that the “Check for updates” checkbox is checked and I advise you to set the check period to “1 month” so that reminders do not come too often. “Stable release versions” should also be marked:
We’re done with the settings here, everything else does not require any changes for normal operation. And if there is any need to change something, you can always turn to the settings.
Now our task is to install and run the virtual machine itself in VirtualBox. Let's get started.
Creating a new virtual hard disk for installing the operating system and configuring it.
Let's look at working with a virtual machine using Windows XP as an example. In most cases, I use this particular system as a virtual one, since it is the most productive, unlike its successors (Windows Vista, 7, 8), and also requires the least resources and takes up the least space on the hard drive. I use Windows 7 as a virtual one only for special purposes, when I need to try something on it.
Of course, to install the system on a virtual machine, you will need the disk itself with the required operating system or an ISO image. You can find them on the Internet in free access on torrent trackers (for example http://pirat.ca/) and others, and can also be found on simple sites / blogs.
So, let's begin the process of preparing the virtual machine for operation using Windows XP as an example:
We find a disk or image with the desired system.
Password for unpacking the archive: 123
Disable your antivirus programs before unpacking, because most of them consider the “help_3.4.exe” file, intended to activate the system, to be a virus. This is not a virus, and antiviruses react this way because it is a hacking program, because it activates the system. And antiviruses consider all hacking programs to be “dangerous”.
To begin installation in VirtualBox, select the “Machine” > “New” menu:
A window will appear in which you need to specify the name (in the “Name” field) of the virtual machine to be created. Just specify it so that you yourself understand what kind of virtual machine it is (if there are several of them). In the “System Type” list, you can select the type of operating system to be installed accordingly. Since we are installing Windows XP in the example, we leave everything by default. In the “Version” list, select the desired version. In our example, this will again be “Windows XP”. Click “Next”:
At the next stage, you need to select the amount of RAM that will be allocated for the operation of the virtual machine. For simple tasks and testing Windows XP, the recommended volume (default) is 192 MB. For newer systems, the recommended volume will be different. But it’s better not to set it less than recommended, the virtual machine will slow down. If you plan to use a virtual machine to work in a box and run many accounts at the same time, then you should allocate a lot of memory, and at least 2 GB. (2048 MB.). But here it’s worth starting from how much real RAM is installed in your computer. I recommend setting the amount of memory to run the virtual machine equal to half of the real one. For example, if your computer has 8192 MB of RAM (8 GB), you can allocate 4096 MB (4 GB) for the virtual machine. You can do even more, but then monitor the performance of the real operating system in which it works. If it slows down, then reduce the amount of allocated memory. I will show you how to change the volume in the future in subsequent steps.
So, you have selected the required amount of memory. Click the “Next” button:
5. At the next stage, you must select “Create a new virtual hard disk”. Pay attention to the recommended hard drive size for this system (you will need to select it later). Click the “Create” button:
Now we will be asked to select the virtual disk format. This choice will determine what other programs you can use the created virtual hard disk with to create and run virtual machines. The easiest way is to leave the default selection “VDI” (VirtualBox Disk Format), since there are no plans to use the created virtual machine with other programs. Click “Next”:
7. At the next stage, you need to select the type of virtual disk to be created: physical or dynamic. I recommend choosing a dynamic one, since it is often necessary to expand its volume for certain needs, but the physical one does not allow this. So, select “Dynamic virtual hard disk” and click “Next”:
8. Now you need to set the size of the virtual hard disk that will be used to run the virtual machine. Whatever volume you specify, that’s what you’ll see in the virtual machine. As you remember, the recommended volume for our system is 10 GB. When this window appears, this optimal volume will already be set here. If no particularly large programs and files will be used in the system, then 10 GB is quite enough (I work with exactly this volume). Calculate what you will use the system for, what size programs you will install on it, and roughly estimate how much space all this will take up. It’s better to never choose less than 10 GB; it may simply end up not being enough for the system itself for updates and other things.
In the top field you can also specify the name of the virtual disk to be created. By default, it is the same as the name of the virtual machine and I recommend not changing anything. After selecting the disk size, click the “Create” button:
After this, the virtual hard disk will be created, and the virtual machine as a whole will be created, but without the operating system installed on it. You will be returned to the main window of the VirtualBox program. Now let’s immediately go through the settings of the created virtual machine.
9. So, your created virtual machine, without a system yet, will appear in the main window. Select it with the mouse and click the “Settings” button and consider the main useful and necessary settings:
In the first tab “General”, and then on the right in the “Advanced” tab there is a useful option “Remember changes while the VM is running”. If this option is enabled, then after each shutdown of the virtual machine, all changes on it will be saved. If you uncheck this box, then any changes made in the system will not be remembered. Those. you will turn on the virtual machine and each time you will see it in the same state as you launched the previous time. This allows you to 100% protect the system from viruses, and also simply keep the virtual system clean.
I recommend leaving this checkbox in place at the beginning (i.e., so that all changes are saved), performing all the necessary system settings, installing and configuring all the necessary programs on this system, and only then unchecking this checkbox and not being afraid that your virtual machine will be damaged. something will get clogged.
11. Switch to the “System” > “Motherboard” tab. Here you can change the amount of RAM allocated to your virtual machine. If you remember, it was asked at the beginning of the process of creating a virtual machine. I had the volume set to 192 MB and in my example I will not change it.
Now let’s switch to “Processor” in the same window. Set the “CPU Load Limit” to 90%. If you leave it at 100%, the virtual machine will sometimes give an error when starting and will not start.
14. Now let’s look at the last and very important function in the settings of the created virtual machine – “Shared Folders”.
While working with a virtual machine, you will probably need some files from the real system. For example, in both systems I use a file with data about accounts on boxes and their wallets. Simply opening a file in a real system and, if necessary, rewriting logins and passwords manually into a virtual machine when logging into a site takes a very long time, and the clipboard does not work. Those. you can't just copy text from some file on the real system and paste it into the virtual system. For all this there is a special function “Shared Folders”. We need to add a folder from the real system in which we work, and it will be available in our virtual machine.
So, in the virtual machine settings, open the “Shared Folders” tab and then add a new folder by clicking the button on the right (it’s the only one available) with the image of a folder with a plus sign:
In the window that opens, in the “Folder Path” field, click the drop-down list button:
Now the window will display the folder we have selected and its name. Be sure to check the “Auto-connect” checkbox so that the folder is always immediately available when the virtual machine boots. Check the “Read Only” checkbox based on your own needs. If you check this box, you will not be able to write or copy anything from the virtual machine to the added shared folder.
I do not check this box so that I can copy any necessary file from the virtual machine to the real system, or change something from the virtual machine in the file of the real system. After making the settings, click “OK”:
Of course, you can add as many folders as you like to suit your needs and for your convenience. At this stage, the shared folders are configured, but in order for them to work later, you will need to install the special “GuestEdition” add-on from the installed system. It's quick and easy, and we'll return to this after installing the Windows XP virtual operating system.
This is where we looked at the basic and necessary settings. Click “OK” in the main settings window:
Now the most important thing remains - install the operating system on the created virtual hard disk. And that is all. Although installing the operating system is a completely separate issue, I will still show this process using the example of Windows XP. Still, this is part of the topic at hand.